

TODAY’S BLOG IS FROM TARA LISSNER @MYSWISSGARDEN.
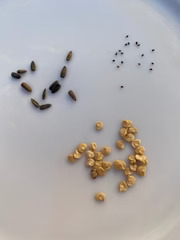
There is something magical about seeds, these tiny little hard seeds filled with the potential to bring food and flowers to your table and make your heart sing a little.
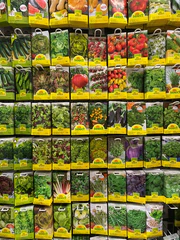
The most difficult decision is to choose what to plant. There are so many possibilities and the range of seeds out there can be a little overwhelming so, where to start?
Seed selection
It is boring to be practical but that is where we have to begin. Firstly, (and most importantly), what do you like to eat?
Once you’ve decided what to grow, next is where to grow. Can you dedicate a spot in your garden for a veggie bed, will you plant among existing plants or are you a balcony gardening with tons of pots?
Seeds can be started indoors, under cover in March to be grown on and transplanted outdoors from mid-May when the last frosts have passed.
Once you’ve decided what to grow, analyze the seed packets carefully. They will give you the ideal planting time, the distance you should keep between plants, the final size of the plant and importantly the harvest time.
Let’s get started:
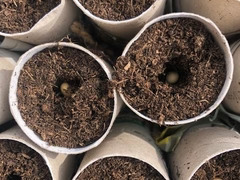
1. Always use seed compost for planting seeds, it is light which enables tiny roots to grow through it without too much effort.
2. Reuse small plastic pots or seed flats making sure they have been cleaned before you start. You can also make your own pots out of toilet rolls with newspaper wrapped over the bottom and secured with twine for seeds like beans which need more room for their long roots.

Seeds flats
3. Fill the pots or flats with seed compost and tap the pots to remove air pockets. Moisten the seed compost before you sow. Sprinkle the seeds on the surface and cover with a fine layer of seed compost. Some seeds are so tiny as to be washed away by watering therefore watering from below prevents the seeds being disturbed and the seedlings damaged by the water.
4. Cover the seed pots or flats with a propagator, cling film or a plastic bag – this creates a moist and warm environment crucial for germination.
5. Next place your seeds in a warm and bright place, a window sill is perfect.
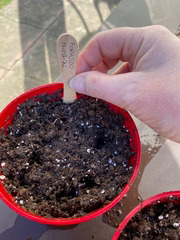
6. Don’t forget to label and date your pots – they will all look the same and you will forget!
Red hot chili peppers
7. Once the seeds begin to push through the soil remove the propagator or covers allowing the air to circulate around the new plants thus preventing damping off when the soil gets too wet.
8. When the first set of true leaves begin to appear it is time to plant the seedlings on to larger pots with more room for growth. The first rounded leaves (cotyledon) allow for photosynthesis, the next set of leaves, true leaves, will look like the leaves of the mature plant.
9. As the roots begin to show through the bottom and the leaves become more bushy it will be the moment to harden them off and acclimatize them to outside temperatures. Take them outside during the day over the course of a week bringing them inside overnight.
10. Plant them out into their permanent spot, water them in well and watch and wait for your crop.
Best of luck.
READ MORE FROM TARA
Tara Lissner is a self taught gardener who shares her local knowledge and experience in her gardening journal my swiss garden.
")
